


Simple RC car for beginners (Android control via Bluetooth)
This is a simple project of Android Bluetooth Car with Bluetooth control. This project is open source and multiplatform: Arduino (Processing), STM32, MSP430, PIC, AVR, FEZ Panda II (.NET Micro Framework) and may be even Raspberry Pi.
To control the car used Android-device with a built-in accelerometer. Tilt forward - car goes forward, tilt to the left - car turns to the left, tilt back - car goes back. Speed of movement or rotation depends on how much you tilt the device. Sensitivity and value of the tilt set in the configuration Android-apps. Also are provided a normal way to control: the buttons on the screen. In addition to all I implemented the touch control. In version 1.2, I added a new type of control: like virtual steering wheel. Total 4 ways to control the RC Car.
Parts needed
1. Android device
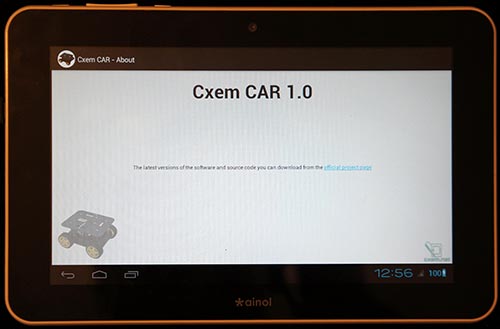
The most important part - Android device with accelerometer and Bluetooth: tablet, smartphone and other... As an Android device, I used a cheap Chinese tablet "Ainol Aurora" with an external USB-Bluetooth module (because its not have own), connected via USB Host.
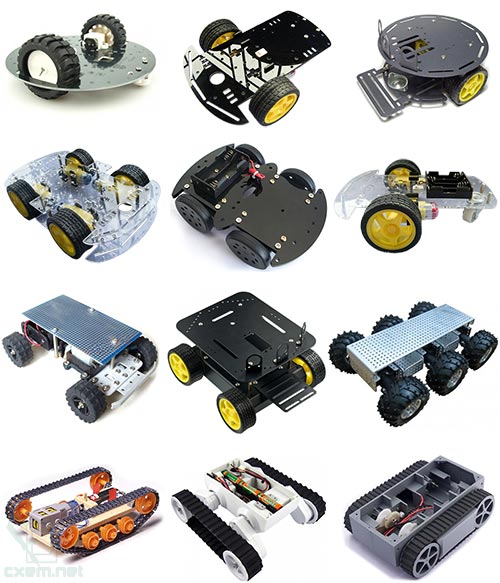
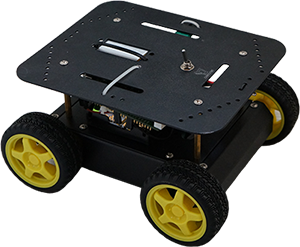
2. DIY Car Chassis
We also need any chassis with 2 or 4 DC motors. You can use an old RC toy car. I bought a 4WD chassis with 4 motors on ebay. To control described in this project is most suitable track chassis.
3. Controller (MCU)
As I said above, the project is planned to be multiplatform. At the present time I implemented the project for:
Arduino
STM32
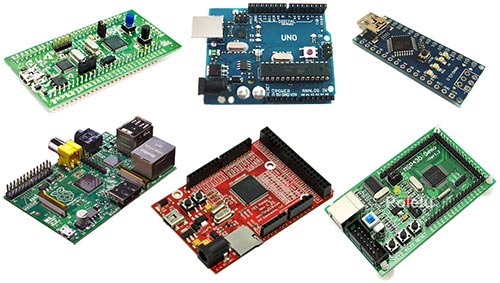
Controller must support 2 PWM and UART.
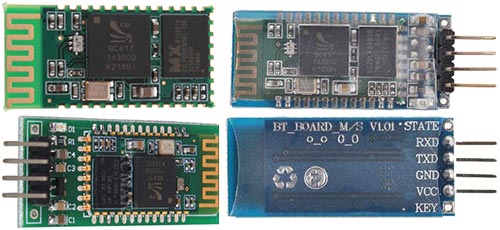
4. Bluetooth module
As a Bluetooth module uses cheap Chinese module HC-06, which has been described in this article.
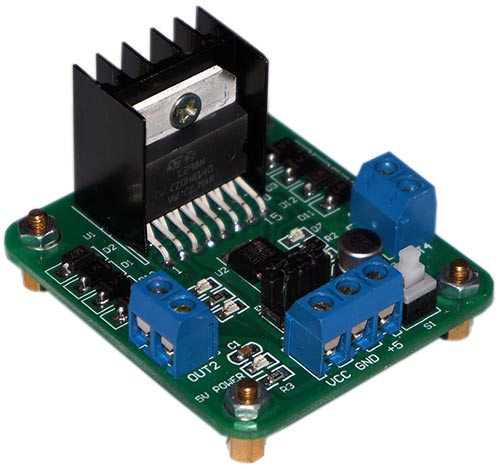
5. Motor Driver
I used L298N Dual Bridge DC stepper Motor Driver module. It cost 4-5$ on eBay.
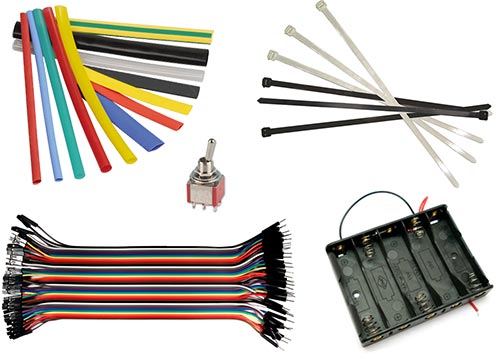
6. Other parts
After assembly:
Theory
All calculations are performed in the Android-application, and immediately calculate the values of the PWM for the left and right motor. Application has flexible settings, such as the range of the PWM, the sensitivity of tilt, the minimum threshold for the PWM and other. Example commands transmitted by Bluetooth:
L-255\rR-120\r
L - the command to the left engine, R - for the right
A dash means the motor rotation to move back
255 - PWM value (for Arduino is the maximum speed of rotation)
\r - end of command.
On this command RC car will move forward and slightly rotated to the right, as right engine rotates slowly left.
L255\rR-255\r
On this command the left engine will rotate back and forward right, forcing a car to rotate around its axis counterclockwise.
H1\r
Command is an additional channel to which you can connect for example lights, sound, etc.
Symbols command L, R and H can be defined in the settings of Android-applications.
In the MCU control program provides a timer that shuts off the engine if the last command was received more than n-seconds ago. The data are stored in the EEPROM memory of the controller and can be changed from Android device. The range of this setting is from 0.1 seconds to 99.9 seconds. This setting can be disabled. To work with EEPROM provides commands: Fr - reading values and Fw - record values.
Electronics
Block diagram of CxemCAR:
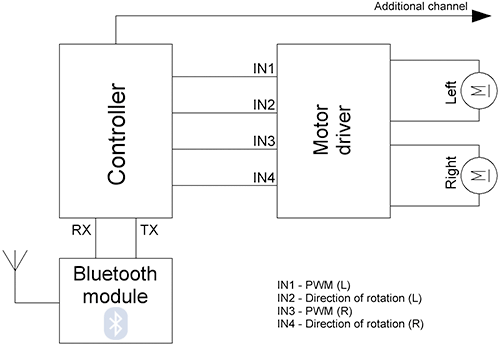
As we can see, the controller (Arduino, STM32, and others it does not matter which one) connects to Bluetooth module and a motor driver with two or four connected motors.
Android Application
The application for Android was written in Eclipse IDE. All sources of the project and the project for Eclipse, you can download below. Android version on your device must be > 3.0.
The application contains several activity. Main activity is a home screen with buttons running different operating modes and settings:
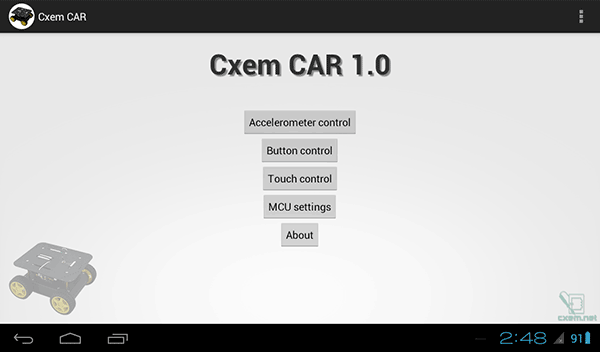
There are 3 control modes Bluetooth-car: from accelerometer, screen buttons and touch-control.
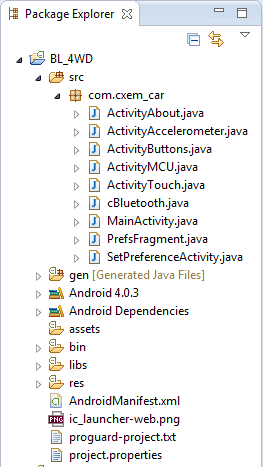
The project structure in Eclipse:
Android application settings
Screenshot of settings CxemCar Android application version 1.0:

MAC address
To establish a connection with the RC Car's Bluetooth module, you must set MAC-address in the application settings. But first, you must configure the pair the devices on Android-device: open Settings -> Bluetooth and click "Search for devices". When the phone finds our Bluetooth-module, click them and enter password for pairing (usually "1234")
To know Bluetooth module MAC-address possible from any application, such as Bluetooth Terminal. To do this, click "Connect a device - Secure" and in the resulting window, click the button "Scan for devices". Software will be scans the Bluetooth devices and displays them MAC-address.
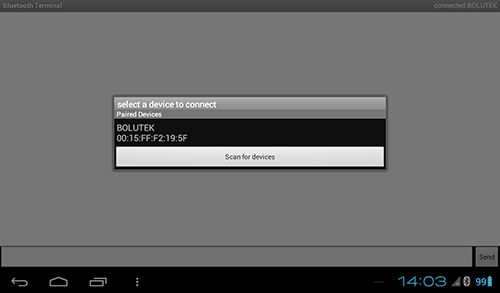
Obtained MAC-address needs to be set in the Android-application CxemCAR
Assembly
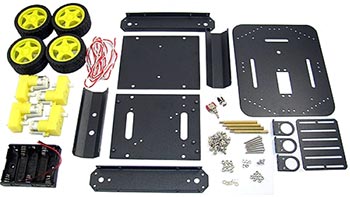
The platform I have chosen Pirate-4WD chassis from the manufacturer DFRobot (SKU: ROB0003). Here is its description and video on the assembly.
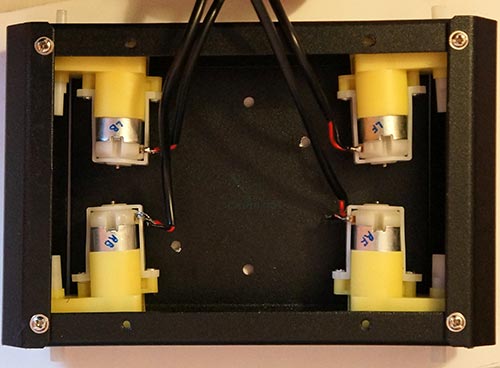
After the base was assembled chassis with motors, solder the wires to the motors
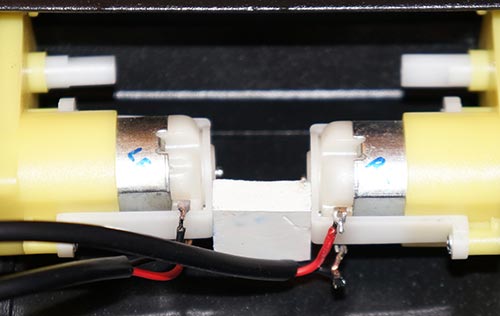
For alignment of motors I made a spacer from plastic
Then the wheels have been set
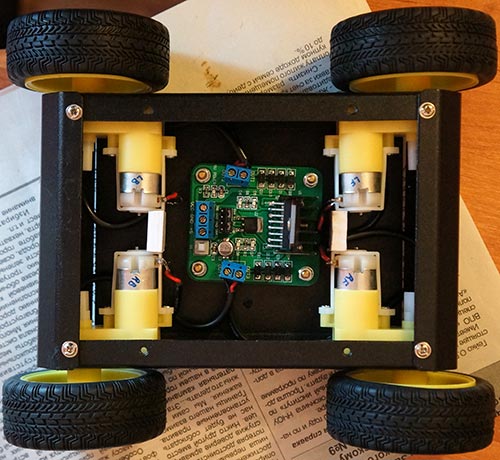
The wires from the 4-motor connect to the motor driver board L298N
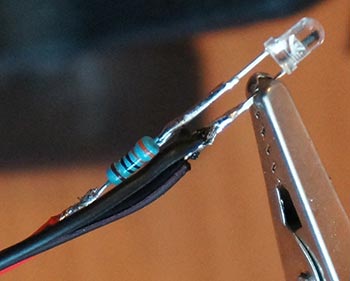
Then connect the LED to indicate Bluetooth status through a resistor 470 Ohm.
To connect the Bluetooth module or make tipsy all necessary wiring, in addition to the LED is power, GND, TX and RX. See the datashit for your Bluetooth module
I used the module HC-06. Wiring diagram is as follows:
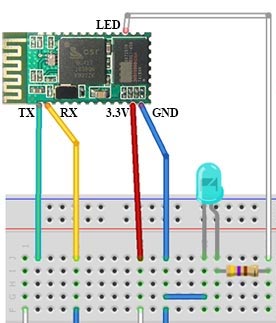
The assembled HC-06 module is as follows:
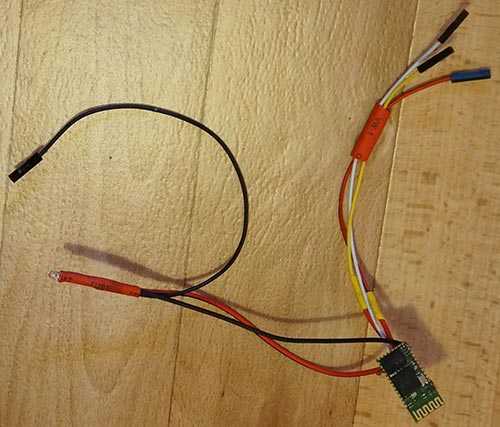
Its placed in heat-shrink tube of large diameter.
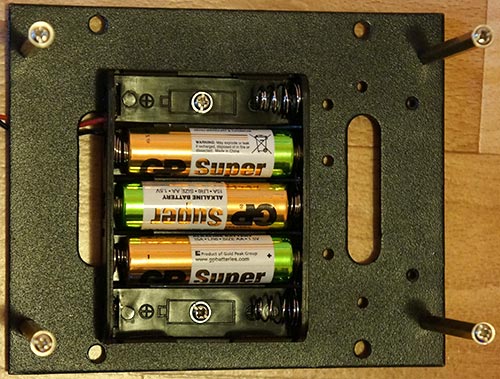
To power the motor, I used the battery holder with five AA batteries, that is, motor supply voltage of 7.5 volts. You can use the LiPo batteries and other
CxemCAR project for Arduino
CxemCAR project for STM32
Download project source for Eclipse
Download APK 1.2
Download APK 1.3
Andoid Project (Eclipse) on GitHub
Version 1.2: Added a new type of management: the virtual steering wheel. Fixed class Handler. Improvements in Bluetooth class.
Video of demonstration the virtual steering wheel mode (1.2 version and above):
The current version of Android application: 1.2 (15.02.2013)
Author: Koltykov A.V.