


Arduino RC car (Android control via Bluetooth)
The first part of the project CxemCAR is here. There are also the source code for Android (Java Eclipse) and other useful information.
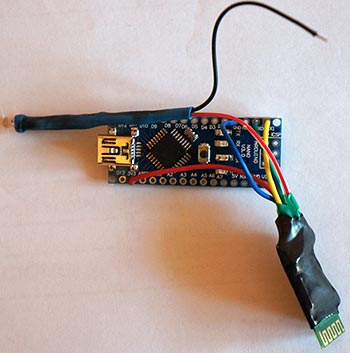
In this article, I will describe the assembly CxemCAR for the Arduino. We can use any Arduino-compatible board: UNO, Nano, Mega, Leonardo, and even based on STM32 - Arduino DUE. I used Arduino Nano V3, purchased on eBay for $ 9.
Wiring diagram:
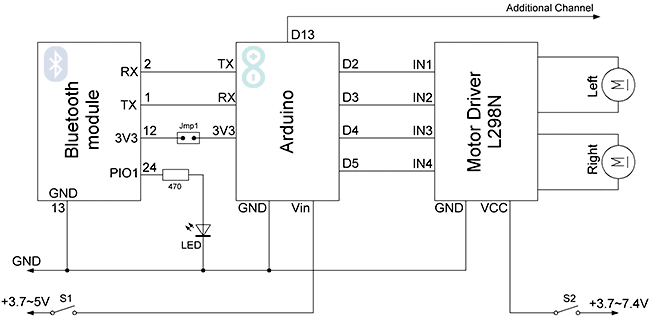
In the circuit I used a jumper (in the scheme Jmp1), because with a connected Bluetooth module is impossible be load sketch to the Arduino.
Beetween BT pin RX (2) and Arduino pin TX may require level shifter. For this, you can use voltage divider: calculator 5V to 3.3V
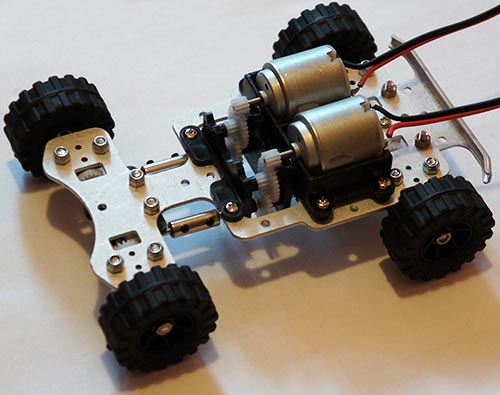
As a platform I used a small RC DIY platform, bought on eBay for $ 25.
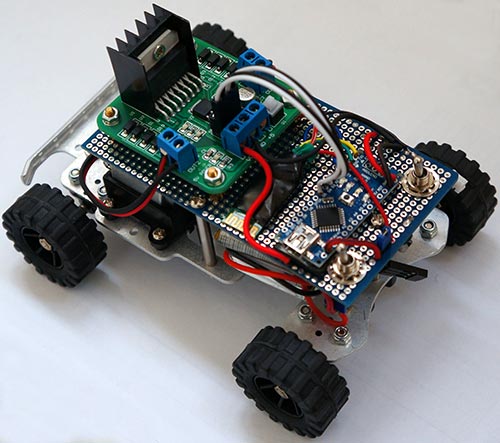
I soldered a Bluetooth-module to the Arduino and led status light. For communication between Arduino and Bluetooth, read this article: Arduino and Bluetooth. Module HC-06 placed in heat-shrink tube 10mm. Bluetooth-state LED with current limiting resistor were also placed in heat-shrink tube.
In the breadboard platform, I drilled a hole and secure motor driver L298N. Arduino board attached with double-sided tape
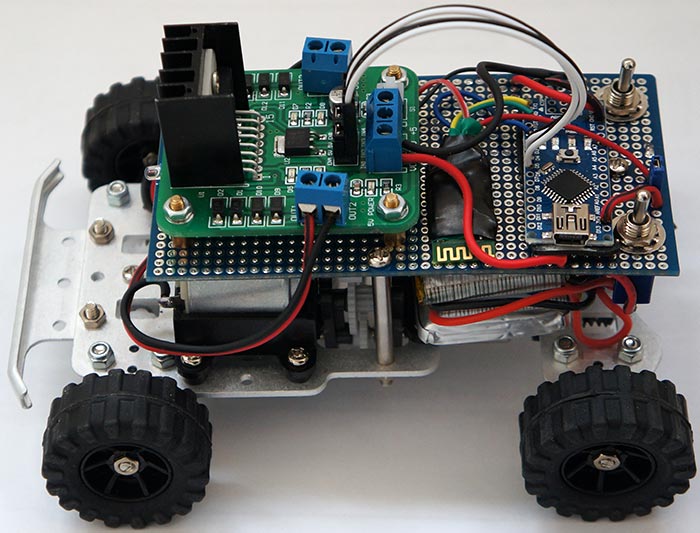
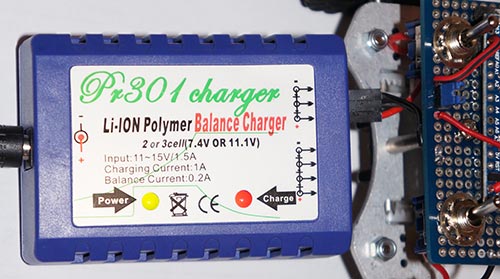
Between the car platform and breadboard I placed 3 Li-Po battery 3.7V 1100 mAh. Power to the controller and motors separately: Arduino powered by a 3.7 V battery, and the motors and driver L298N from two 3.7V batteries connected in series. There are two 2-position power switch - one position is the power from the batteries to consumers, in the other position to charging terminals.
Software
The program was written in Arduino IDE 1.01.
// CxemCAR 1.0 (06.01.2013)
// Project Page: //english.cxem.net/mcu/mcu3.php

#include "EEPROM.h"

#define D1 2          // direction of motor rotation 1
#define M1 3          // PWM left motor
#define D2 4          // direction of motor rotation 2
#define M2 5          // PWM right motor
#define HORN 13       // additional channel 1
//#define autoOFF 2500  // milliseconds after which the robot stops when the connection

#define cmdL 'L'      // UART-command for left motor
#define cmdR 'R'      // UART-command for right motor
#define cmdH 'H'      // UART-command for additional channel (for example Horn)
#define cmdF 'F'      // UART-command for EEPROM operation
#define cmdr 'r'      // UART-command for EEPROM operation (read)
#define cmdw 'w'      // UART-command for EEPROM operation (write)

char incomingByte;    // incoming data

char L_Data[4];       // array data for left motor
byte L_index = 0;     // index of array L
char R_Data[4];       // array data for right motor
byte R_index = 0;     // index of array R
char H_Data[1];       // array data for additional channel
byte H_index = 0;     // index of array H
char F_Data[8];       // array data for  EEPROM
byte F_index = 0;     // index of array F
char command;         // command

unsigned long currentTime, lastTimeCommand, autoOFF;

void setup() {
  Serial.begin(9600);       // initialization UART
  pinMode(HORN, OUTPUT);    // additional channel
  pinMode(D1, OUTPUT);      // output for motor rotation
  pinMode(D2, OUTPUT);      // output for motor rotation
  /*EEPROM.write(0,255);
  EEPROM.write(1,255);
  EEPROM.write(2,255);
  EEPROM.write(3,255);*/
  timer_init();             // initialization software timer
}

void timer_init() {
  uint8_t sw_autoOFF = EEPROM.read(0);   // read EEPROM "is activated or not stopping the car when losing connection"
  if(sw_autoOFF == '1'){                 // if activated
    char var_Data[3];
    var_Data[0] = EEPROM.read(1);
    var_Data[1] = EEPROM.read(2);
    var_Data[2] = EEPROM.read(3);
    autoOFF = atoi(var_Data)*100;        // variable autoOFF ms
  }
  else if(sw_autoOFF == '0'){
    autoOFF = 999999;
  }
  else if(sw_autoOFF == 255){
    autoOFF = 2500;                      // if the EEPROM is blank, dafault value is 2.5 sec
  }
  currentTime = millis();                // read the time elapsed since application start
}

void loop() {
  if (Serial.available() > 0) {          // if received UART data
    incomingByte = Serial.read();        // raed byte
    if(incomingByte == cmdL) {           // if received data for left motor L
      command = cmdL;                    // current command
      memset(L_Data,0,sizeof(L_Data));   // clear array
      L_index = 0;                       // resetting array index
    }
    else if(incomingByte == cmdR) {      // if received data for left motor R
      command = cmdR;
      memset(R_Data,0,sizeof(R_Data));
      R_index = 0;
    }
    else if(incomingByte == cmdH) {      // if received data for additional channel
      command = cmdH;
      memset(H_Data,0,sizeof(H_Data));
      H_index = 0;
    }
    else if(incomingByte == cmdF) {      // if received data for EEPROM op
      command = cmdF;
      memset(F_Data,0,sizeof(F_Data));
      F_index = 0;
    }
    else if(incomingByte == '\r') command = 'e';   // end of line
    else if(incomingByte == '\t') command = 't';   // end of line for EEPROM op

    if(command == cmdL && incomingByte != cmdL){
      L_Data[L_index] = incomingByte;              // store each byte in the array
      L_index++;                                   // increment array index
    }
    else if(command == cmdR && incomingByte != cmdR){
      R_Data[R_index] = incomingByte;
      R_index++;
    }
    else if(command == cmdH && incomingByte != cmdH){
      H_Data[H_index] = incomingByte;
      H_index++;
    }
    else if(command == cmdF && incomingByte != cmdF){
      F_Data[F_index] = incomingByte;
      F_index++;
    }
    else if(command == 'e'){                       // if we take the line end
      Control4WD(atoi(L_Data),atoi(R_Data),atoi(H_Data));
      delay(10);
    }
    else if(command == 't'){                       // if we take the EEPROM line end
      Flash_Op(F_Data[0],F_Data[1],F_Data[2],F_Data[3],F_Data[4]);
    }
    lastTimeCommand = millis();                    // read the time elapsed since application start
  }
  if(millis() >= (lastTimeCommand + autoOFF)){     // compare the current timer with variable lastTimeCommand + autoOFF
    Control4WD(0,0,0);                             // stop the car
  }
}

void Control4WD(int mLeft, int mRight, uint8_t Horn){

  bool directionL, directionR;      // direction of motor rotation L298N
  byte valueL, valueR;              // PWM M1, M2 (0-255)

  if(mLeft > 0){
    valueL = mLeft;
    directionL = 0;
  }
  else if(mLeft < 0){
    valueL = 255 - abs(mLeft);
    directionL = 1;
  }
  else {
    directionL = 0;
    valueL = 0;
  }

  if(mRight > 0){
    valueR = mRight;
    directionR = 0;
  }
  else if(mRight < 0){
    valueR = 255 - abs(mRight);
    directionR = 1;
  }
  else {
    directionR = 0;
    valueR = 0;
  }

  analogWrite(M1, valueL);            // set speed for left motor
  analogWrite(M2, valueR);            // set speed for right motor
  digitalWrite(D1, directionL);       // set direction of left motor rotation
  digitalWrite(D2, directionR);       // set direction of right motor rotation

  digitalWrite(HORN, Horn);           // additional channel
}

void Flash_Op(char FCMD, uint8_t z1, uint8_t z2, uint8_t z3, uint8_t z4){

  if(FCMD == cmdr){		      // if EEPROM data read command
    Serial.print("FData:");	      // send EEPROM data
    Serial.write(EEPROM.read(0));     // read value from the memory with 0 address and print it to UART
    Serial.write(EEPROM.read(1));
    Serial.write(EEPROM.read(2));
    Serial.write(EEPROM.read(3));
    Serial.print("\r\n");	      // mark the end of the transmission of data EEPROM
  }
  else if(FCMD == cmdw){	      // if EEPROM data write command
    EEPROM.write(0,z1);               // z1 record to a memory with 0 address
    EEPROM.write(1,z2);
    EEPROM.write(2,z3);
    EEPROM.write(3,z4);
    timer_init();		      // reinitialize the timer
    Serial.print("FWOK\r\n");	      // send a message that the data is successfully written to EEPROM
  }
}
The code uses a library to work with EEPROM AVR-memory. Arduino board by USART from the Bluetooth module receives data ready for the left and right engine. All basic calculations are performed in the Android application.
Download INO code for Arduino IDE
Author: Koltykov A.V.