Control an Android device from Arduino
In a previous article we looked at Control an Arduino from your Android device. In this article we will discuss how to Control an Android device from Arduino.
In Android device we will send 2 variables: random number and state state of the button.
Arduino Code
#include#include // Adb connection. Connection * connection; long lastTime; byte rndNum; // Random number int buttonState = 0; // State of the button uint16_t tosend; // Data send to Android const int buttonPin = 2; // Button PIN void setup() { pinMode(buttonPin, INPUT); // Initialization ADB. ADB::init(); // Open an ADB stream to the phone's shell. Auto-reconnect. Use any unused port number eg:4568 connection = ADB::addConnection("tcp:4568", true, NULL); //Serial.begin(115200); randomSeed(analogRead(0)); } void loop() { if ((millis() - lastTime) > 100) // Every 100 ms { rndNum = random(1, 99); // Random number from 1 to 99 buttonState = digitalRead(buttonPin); // State of the button tosend = (rndNum << 8) | buttonState; // Make a word from 2 bytes Serial.println(tosend,BIN); connection->write(2,(uint8_t*)&tosend); // Send 2 bytes lastTime = millis(); } // Poll the ADB subsystem. ADB::poll(); }
Android code
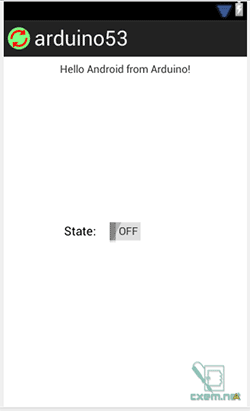
For our Activity we need 2 elements: TextView and Switch.

Source code of MainActivity:
package com.example.arduino53;

import java.io.IOException;

import org.microbridge.server.Server;
import org.microbridge.server.AbstractServerListener;

import android.os.AsyncTask;
import android.os.Bundle;
import android.app.Activity;
import android.util.Log;
import android.widget.Switch;
import android.widget.TextView;

public class MainActivity extends Activity {

    private int Ard_data1 = 0;
    private int Ard_data2 = 0;
    public final String APP_NAME = "arduino53";

    Server server = null;

    @Override
    public void onCreate(Bundle savedInstanceState) {
        super.onCreate(savedInstanceState);
        setContentView(R.layout.activity_main);
        // Create TCP server (MicroBridge LightWeight)
      try
      {
          server = new Server(4568); //Port
          server.start();
      } catch (IOException e)
      {
          Log.e(APP_NAME, "Unable to start TCP server", e);
          System.exit(-1);
      }

        server.addListener(new AbstractServerListener() {

            @Override
            public void onReceive(org.microbridge.server.Client client, byte[] data)
            {
                Log.d(APP_NAME, "data0:"+data[0]+"; data1:"+data[1]);
                if (data.length<2) Log.e(APP_NAME, "The data less than 2 bytes:"+data.length);

                Ard_data1 = data[0];
                Ard_data2 = data[1];

                //Any update to UI can not be carried out in a non UI thread like the one used
                //for Server. Hence runOnUIThread is used.
                runOnUiThread(new Runnable() {
                    //@Override
                    public void run() {
                        new UpdateData().execute(Ard_data1,Ard_data2);
                    }
                });
            }
        });
    }

    @Override
    protected void onDestroy (){
     super.onDestroy();
     server.stop();
    }

    class UpdateData extends AsyncTask {
        // Called to initiate the background activity
        @Override
        protected Integer[] doInBackground(Integer... ArdState) {
            return (ArdState);  //Return to onPostExecute()
        }

        @Override
        protected void onProgressUpdate(Integer... values) {
            super.onProgressUpdate(values);
            // Not used in this case
        }

        @Override
        protected void onPostExecute(Integer... result) {
            //Log.d(APP_NAME, "onPostExecute0:"+result[0]);
            //Log.d(APP_NAME, "onPostExecute1:"+result[1]);

            TextView txt_btn_Arduino = (TextView) findViewById(R.id.textDistance);
            txt_btn_Arduino.setText(String.valueOf(result[1]));    // Print a random number from Arduino to activity

            Switch switch1 = (Switch) findViewById(R.id.switch1);

            if(result[0] == 1){
                switch1.setChecked(true);		// Toggle state switch
            }
            else switch1.setChecked(false);
        }
    }
}
In this code uses method onReceive() which is called whenever data comes from Arduino. To update UI elements on Activity we use a class AsyncTask.
Video:
Download source code for Arduino, Android and Libraries
Author: Koltykov A.V.


