Control an Arduino from your Android device
This article shows you how to control an Arduino from your Android device. We will use USB connection. There are two ways to talk beetwen Arduino and Android: Android Debug Bridge (ADB) MicroBridge mode and Android Open Accessory Protocol. In this example we will consider a MicroBridge mode and will transfer data from Android device to the Arduino.
For Arduino programming we need Arduino IDE
For Android programming we need: Java SE Development Kit, Eclipse IDE, plugin Android Development Tools (ADT) for Eclipse and Android SDK.
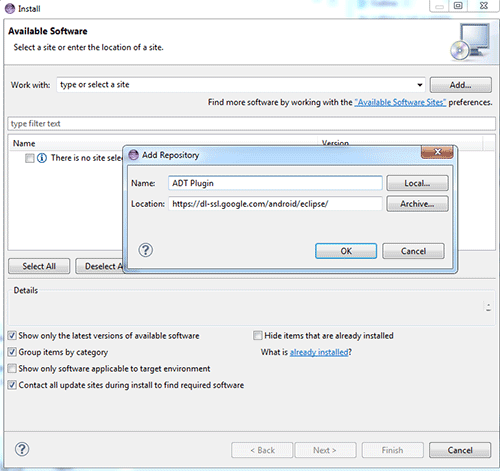
After Eclipse is installed, you must install Android Development Tools (ADT). For this go to "Help->Install New Software..." and press button "Add". In the field "Location" enter url: https://dl-ssl.google.com/android/eclipse/

Now we are ready for our first project.
Arduino Code
#include#include // Adb connection. Connection * connection; // Event handler for the shell connection. // This event handler is called whenever data is sent from Android Device to Seeeduino ADK. // Any data / command to be sent to I/O of ADK has to be handled here. // // For eg: 1.Controlling an ouput port 2.Interacting with a device connected // to ADK via IIC or Serial Port. void adbEventHandler(Connection * connection, adb_eventType event, uint16_t length, uint8_t * data) { if (event == ADB_CONNECTION_RECEIVE) // If recieve data { digitalWrite(13, data[0]); // Change LED state Serial.println(data[0],DEC); // Debug } } void setup() { Serial.begin(57600); pinMode(13,OUTPUT); // Use internal LED L Seeeduino ADK // Initialization ADB. ADB::init(); // Open an ADB stream to the phone's shell. Auto-reconnect. Use any unused port number eg:4568 connection = ADB::addConnection("tcp:4568", true, adbEventHandler); } void loop() { // Poll the ADB subsystem. ADB::poll(); }
Android code
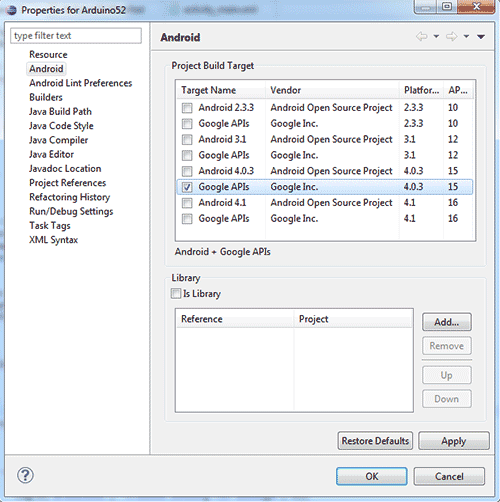
In Eclipse IDE go to "New -> Project..." and fill the fields. Make sure that the Build SDK is selected to Google APIs and not to Android!

The next step you need to add permission to manifest file:
<uses-permission android:name="android.permission.INTERNET" />
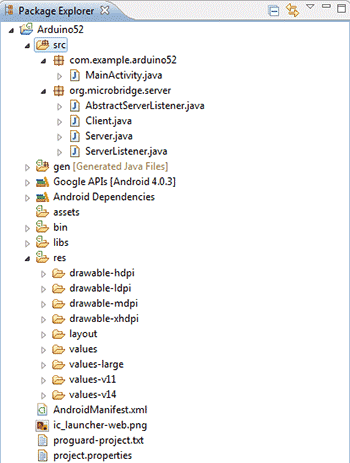
Still, we need library for MicroBridge mode. You need copy 4 files in folder /src/org/microbridge/server/ to your project. After, our project (in Package Explorer) will look like this:

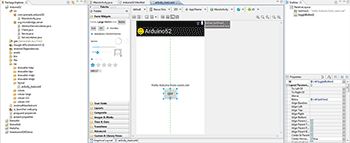
Then we need to do main Activity of our Android application. For it we need 2 elements: TextView and ToggleButton.
Source code of our MainActivity:
package com.example.arduino52;

import java.io.IOException;
import org.microbridge.server.Server;

import android.os.Bundle;
import android.util.Log;
import android.app.Activity;
import android.widget.ToggleButton;
import android.widget.CompoundButton;

public class MainActivity extends Activity implements CompoundButton.OnCheckedChangeListener {

	Server server = null;

    @Override
    public void onCreate(Bundle savedInstanceState) {
        super.onCreate(savedInstanceState);
        setContentView(R.layout.activity_main);

        ToggleButton mButton = (ToggleButton)findViewById(R.id.toggleButton1);
        mButton.setOnCheckedChangeListener(this);

        // Create TCP server (MicroBridge LightWeight)
     	try
     	{
     		server = new Server(4568); //Port
     		server.start();
     	} catch (IOException e)
     	{
     		Log.e("arduino52", "Unable to start TCP server", e);
     		System.exit(-1);
     	}

    }

    @Override
    protected void onDestroy (){
    	super.onDestroy();
    	server.stop();
    }

	public void onCheckedChanged(CompoundButton buttonView, boolean isChecked) {
		byte data;
		if(isChecked)	// If button checked
		{
			data = 1;
		}
		else
		{
			data = 0;
		}

		try
		{
			//Send data
			server.send(new byte[] {(byte) data});
		} catch (IOException e)
		{
			Log.e("arduino52", "Problem sending TCP message", e);
		}
	}
}
To send data using the method server.send ()
Video:
Download source code for Arduino, Android and Libraries
Author: Koltykov A.V.


