Lightning Activated Camera Shutter Trigger

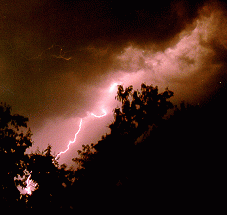
This picture was taken using the circuit.


Description
This circuit is used to trigger a camera's electronic shutter circuit when a flash of lightning is present. This circuit would also work for photographing fireworks displays or other events involving flashes of light.
Theory
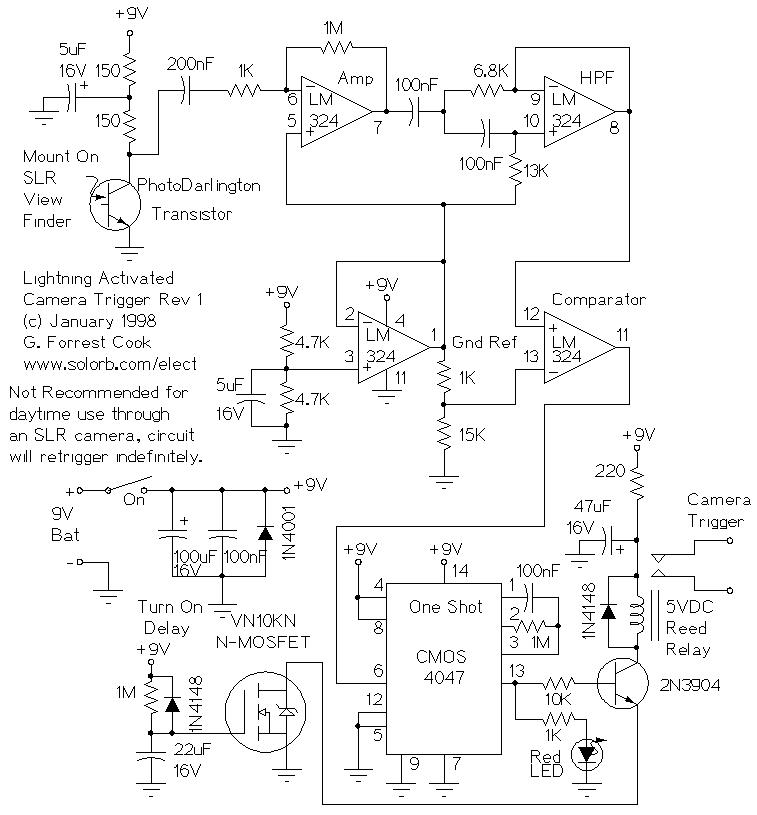
In a nutshell, the photo darlington converts light pulses into electrical pulses, the first LM324 section amplifies the electrical pulses, the second LM324 section is a high pass filter that only passes quick changes (lightning). The third LM324 stage is a comparator that allows only large pulses to pass through, and the 4047 one-shot stretches out the length of the pulses so that they are long enough to drive the relay and trigger the camera.
The 2N3904 drives the reed relay, which in turn triggers the camera's electronic shutter switch. The VN10KM prevents the circuit from triggering the camera when it is first turned on. The LM324 GND Ref circuit divides the 9V power into two for a 4.5V ground reference. The other op-amp circuits use this reference value
.Parts
The original photodarlington transistor I used was a QT semiconductor model QT-L14R1. A similar part that is available from Digi-key is the Optek OP560C, part number 365-1073-ND. The VN10KM is an N channel mosfet transistor. If a VN10KM FET cannot be found, substitute a more common IRF520 or similar N-channel power MOSFET. The 4047 is a standard 4000 series CMOS one-shot, Digi-key sells it as part number CD4047BCN-ND.
Construction
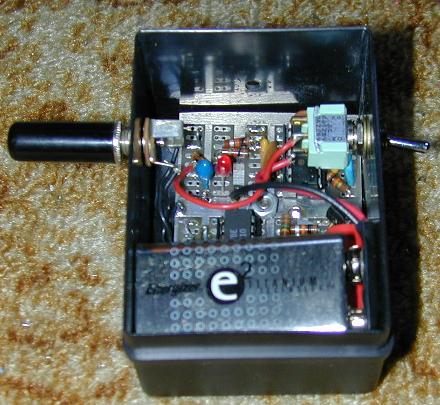
The circuit can be built on a small piece of perforated circuit board using a point-to-point wiring technique. The circuit board can be mounted inside of a small plastic case, preferably made of black plastic. The photodarlington transistor can be mounted in a hole on the side of the box, a small metal clip can be used to slide over the camera's viewfinder. Unfortunatly, there is no standard for viewfinder mounts between camera manufacturers.
When shooting through an SLR camera, this circuit should only be used at night. Daytime use will cause it to retrigger indefinitely because the SLR's viewfinder goes black then bright when the photo is done, this restarts the detector
.For daytime use, it may be preferable to mount the photodarlington transistor in a black tube, the tube should be cut to a length that gives the transistor an angle of view that is similar to the camera lens setting. The back of the tube should be covered with something black to block light from the back side.
Use
The camera should always be set up on a tripod, the lightning trigger should be physically secured to the camera. Slower film speeds will improve the ability to capture lightning photos. I have had good luck with ASA 100 and 200 film, both color and black and white.
The camera setting depends on the model used, I have taken many good shots with a Nikon N2000 camera in auto-exposure mode. A newer Nikon N70 responds too slowly in auto-exposure mode, try using a manual exposure mode with a tight F setting and a long time duration. A digital camera would be ideal, due to the "free film". Unfortunately, very few digital cameras have external trigger inputs, and many suffer from a very long delay from shutter press until the photo is taken. The use of manual exposure settings may improve the speed of the camera.
When dealing with large thunderstorms, lightning strikes often create a conductive path, then strike multiple times through the same path. This type of strike is the easiest to photograph. The most difficult strikes to catch are single zaps in the daytime. Daylight photos require short exposure times, lowering the chances of a zap being caught on film.
When using this circuit, be prepared to run through a lot of film, a good storm can empty a 36 exposure roll in just a few minutes. Typically, around half of those shots will be good when taking nighttime photos. Different storms have different "personalities", some will produce a lot of quick zaps, while others will light the sky up in an almost continuous manner.
When using the circuit, be sure to stay away from sources of flickering light such as street lights and fluorescent lights, they will cause false triggering. It is normal for the circuit to activate constantly when in the presence of indoor lights. I recommend testing the circuit by shining a flash light across the detector in a completely dark room.
If you get any good photos using this circuit, I would love to see them.
Use Caution
Lightning storms can be extremely dangerous, and are potentially fatal. It is best to use the circuit to photograph storms that are many miles away from the photographer. Always keep an eye on the sky, storms can reform overhead fairly quickly. Never sit on top of a hill or in an open field when storms are nearby. It is possible to use this setup from inside of a house or car, just make sure to turn off all of the lights.
Resources
Lightning web ring for lots of lightning information.
Here are more lightning pictures taken by someone who used a modified version of this circuit.
Matthew Cole has put together a web page full of interesting lightning photograpy pictures and resources.
NASA's GHCC Lightning & Atmospheric Electricity Research site.
Parts for this project are available from digi-key
Source:www.solorb.com


